The will of the Emperor is done. As the blood of the slain is laid upon you so may you lay the enemy’s blood at the feet of the Emperor. Lay blood at the Emperor’s feet. As the rune of protection is inscribed upon you so may the litanies of protection ward your soul. May your soul be guarded from impurity. As the warriors within you guide your weapons, may you in your turn, guide their lives. Stand true against the trials of war.
The Prima Incubatorta, the rite of Titan awakening.
Reader note: This build started Summer 2019 and featured on the original Legio Traitoris Blog at www.legiotraitoris.co.uk
Ever since my first visit to the museum at Warhammer World, Nottingham, i’ve loved the sheer imposing presence of the Warlord Titans. In fact, even the humble Warhound Titan piqued my interest. Reading Dan Abnett – Titanicus (ISBN 9781844167845) did absolutely nothing to sake my interest, instead fuelling it.
So i bought Umbra Mortalis “Shadow of Death” my Warhound Titan. It was a not-too-princely sum of £419, buying the body, a Vulcan Mega Bolter, Plasma Blast Gun and Turbo Laser Destructor. A year later, i still yearned for a Warlord. Knowing that it’d likely be a display piece only.
And then i received a bonus in my pay packet. Deciding that i’d probably never get the chance to buy a Warlord titan again, i put the pre-requisite funds down in Forgeworld. This was a little more expensive than i intended – being £1,303 for the body, an Arioch Power Claw, Volcano Cannon and two carapace Laser Blasters.
It arrived innocuously in a large brown box with a white address label on. Upon opening, i was presented with three of the Forgeworld special item boxes with the Titanicus logo on and a few bags of carapace weapons, power claw and volcano cannon.

Cleanup was, quite frankly, a horrendous time sink. Forgeworld release agent is exceptionally greasy these days and a solid scrub was required to get it clean. However, once it was done, every was laid out and inspected for irregularity. No slippage, warping or bending was found – so i began with planning the build.
I was on Summer leave at this point and with very little planned in, so i could anticipate a solid 4-6 hours a day on the project. I therefore expected that this build phase would take three weeks. Drawing up a full day by day plan worked well as i didn’t feel “build completion pressure” like you can sometimes experience. With that – the work began.
Firstly, i identified that i didn’t quite have all of the tools i required. A 13mm spade drill bit to core out the magnet holes for the weapons systems. A quick trip to ScrewFix secured the drill bit and some decent Mitre Superglue with an aerosol quick set.
Yes, readers, this is a titan that has no epoxy in it. Many will say pinning and epoxy is the key to building titans, and whilst pinning i agree with, epoxy i don’t. If it’s mixed badly it won’t set properly and as a result it’ll create a semi-bonded mess that’s a nightmare to clear up. Superglue is at least fast setting and as solid when combined with pinning as epoxy is. Edit: A year on, with multiple bangs about it’s still solid as a rock!
The main section of the body went together quickly enough, seeing the end of the first week. I made some modifications along the way, drilling holes in between where the armour and the arm mounts bolt in.

Why i hear you ask? Well, i decided to make this special after realising how much free space is in the upper half of the model. To that end, i’ve fitted a JBL Go! bluetooth speaker to the interior. This enables me to hook the Titan up to an iPhone or iPad and play custom sound files that i’d create later in the leave period.
The sound board application i used is called Soundboard Studio and costs a princely £54.99 from the App Store. I used Audacity 2 Dawn of War: Apocalypse and YouTube to record the commercial sounds and add in distortion and reverb etc. For the remaining verbal sounds i used a Turtlebeach headset attached to my laptop.

The head, a Mars Pattern Beta head i secured from Heresy Trading (avoiding eBay scalpers at the time), is mounted on a countersunk 10mm aluminium shaft to allow me to remove the head from time to time – or when it dies and i have to “eject” the most important part of the titan crew – the Princeps and his/her moderati. Additionally, i chose to fit a 3mm LED and clip in cap to the central eye of the head and a rear deck light – red ones to fit the theatrics of a Legio Traitoris! This i got from Jennifer at SmallScaleLighting in a pre-built form with 2x AAA battery pack.

The arm mounts were a bit of a trial by fire affair to be honest. Boring out the 13mm hole was a solid shout – but the iron shafts i had bought simply wouldn’t hold the arms in place. So, living under the adage of improvise, adapt and overcome, i simply left the drill extensions in place and bonded them. In short, it works an absolute treat.
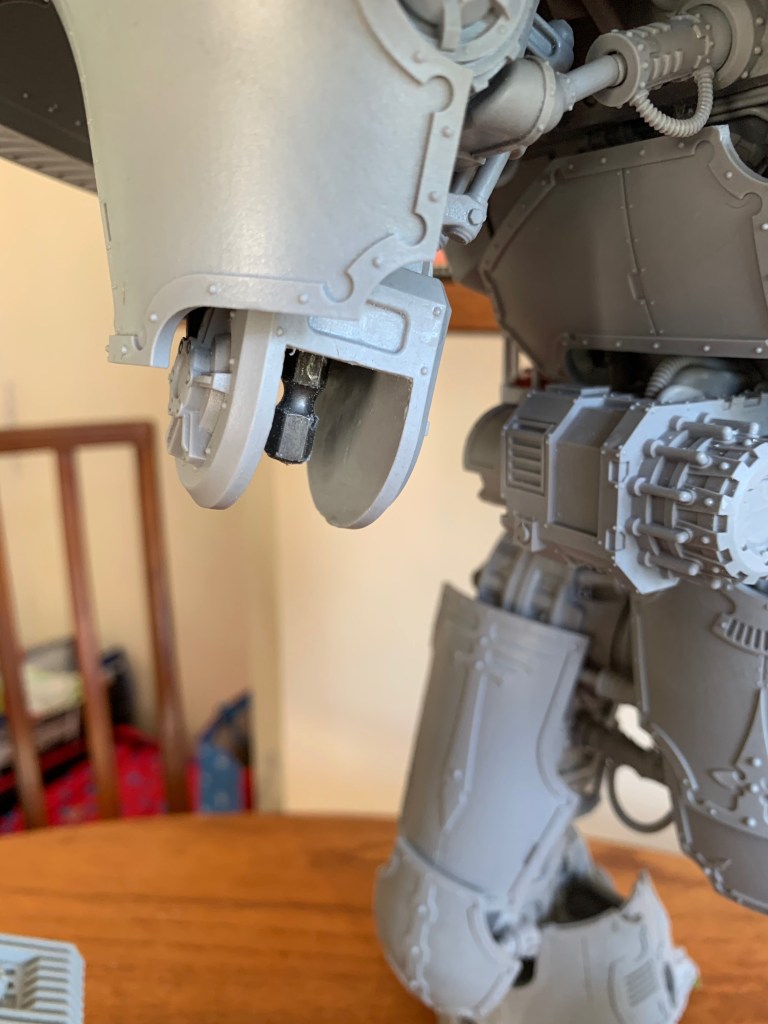
With a little bit of tinkering, the Volcano Cannon arm was cored out and the magnets aligned correctly. It took a lot of measuring! Measure twice, cut once!

Finally, the Arioch Power Claw took some seven attempts to get the mount right. By virtue of the fact the claw has a wrist section that i wanted to rotate, i needed to mount a magnet and a solid shaft to rotate on. Again, spare drill shafts came to my rescue!
At this point i was midway though week 3. Slightly ahead of the build planner, but happy nonetheless.
Painting was next on the cards. I’ve already built and painted a Warhound and Reaver, advancing my skill level painting and weathering yellow and going firm with my freehand of the fire motifs of Legio Fureans. This took a little “rehearsing” as i hadn’t done it in a while, but everything went roughly to plan. It took 2 weeks to get the base coats down, a further week to get the freehand done and a week to add weathering and decals. The end result:


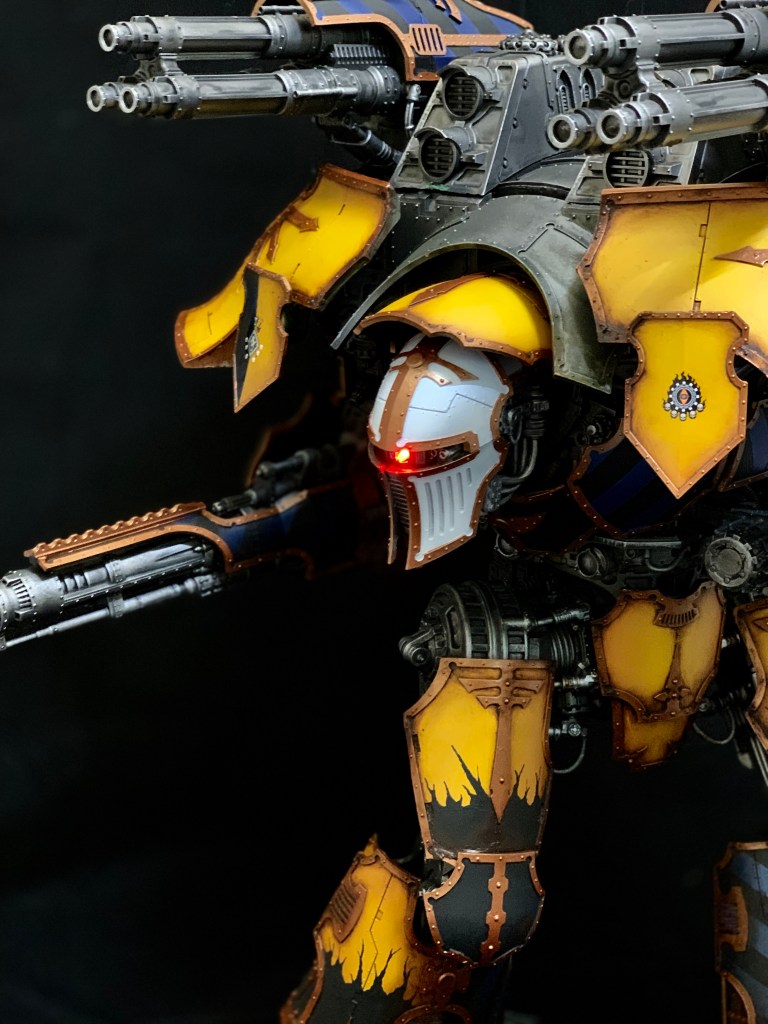

Legio Fureans Colour Scheme:
Primer: Vallejo Black Primer
Rust: Citadel Typhus Corrosion/Citadel Khorne Red/Citadel Mephiston Red/Vallejo Mud
Trim: Citadel Rust Metallic
Wash: Agrax Earthshade
Scratches: Vallejo Mud/Vallejo White
Chips: Vallejo Mud/Vallejo White
Flame Free Hand: Vallejo Black
Chassis:
Base: Vallejo Gunmetal
Mid: Vallejo Aluminium
High: Vallejo Chrome
Wash: MIG Engine Wash
Edge: Vallejo Aluminium
Armour:
Base: Citadel Averland Sunset
High: Citadel Flash Gitz Yellow
Edge Burn: Vallejo Black
Weathering: Burnt Umber Oil Paint
Head:
Base: Vallejo Black/Vallejo White 60/40
High: Vallejo White
Wash: MIG Engine Wash
Decals:
Forgeworld/Games Workshop Adeptus Titanicus Legio Fureans Sheet
Forgeworld/Games Workshop Titan Sheet
MicroSol
MicroSet
The Future:
I’m tempted to repaint in Legio Vulcanum colours – black with teal and yellow trim in the pre-heresy. However, this would take a considerable amount of effort and i additionally would have to repaint my Warhound and Reaver to suit my OCD. We will see what happens. For now, the future brings with it many Heresy games whereby the Warlord shall appear fighting against the false emperor!
Until the battle reports then!

[…] one Fast Attack choice and one Heavy Support choice. This is the Organisation i use to field Nuncio Mortis, my Warlord […]
LikeLike
[…] one Fast Attack choice and one Heavy Support choice. This is the Organisation i use to field Nuncio Mortis, my Warlord […]
LikeLike