Details:
Date: 03 April 22
Points Limit: 8,000 points (4,000 points per player).
Primary Mission: Tide of War (Massacre, pg184). Each sector of the battlefield has a pre-determined VP value. Own Deployment: 2VP. No-mans Land: 5VP. Enemy Deployment: 7VP. Scoring units are Troops choices, Heavy Support choices and Lords of War.
Secondary Mission: Slay the Warlord, First Blood, Last Man Standing.
Timeframe: 1100-1800.
Location: 4TK Gaming, Davey Close, Colchester.
Narrative:
The Dropsite Massacre saw the Raven Guard battered and on the brink of destruction as a Legion. Corax, having conducted geneseed regeneration under the blessing of the Emperor began to conduct strikes against the advancing Traitor forces. This saw several engagements occur on the fringes of the Sol system. One such engagement occurred on the world of Gedi Prime, a dark, rocky world that orbited a dying star. Using the lure of a Dark Age of Technology relic, the Raven Guard set a trap to spring on the advancing Sons of Horus.
Army Lists:
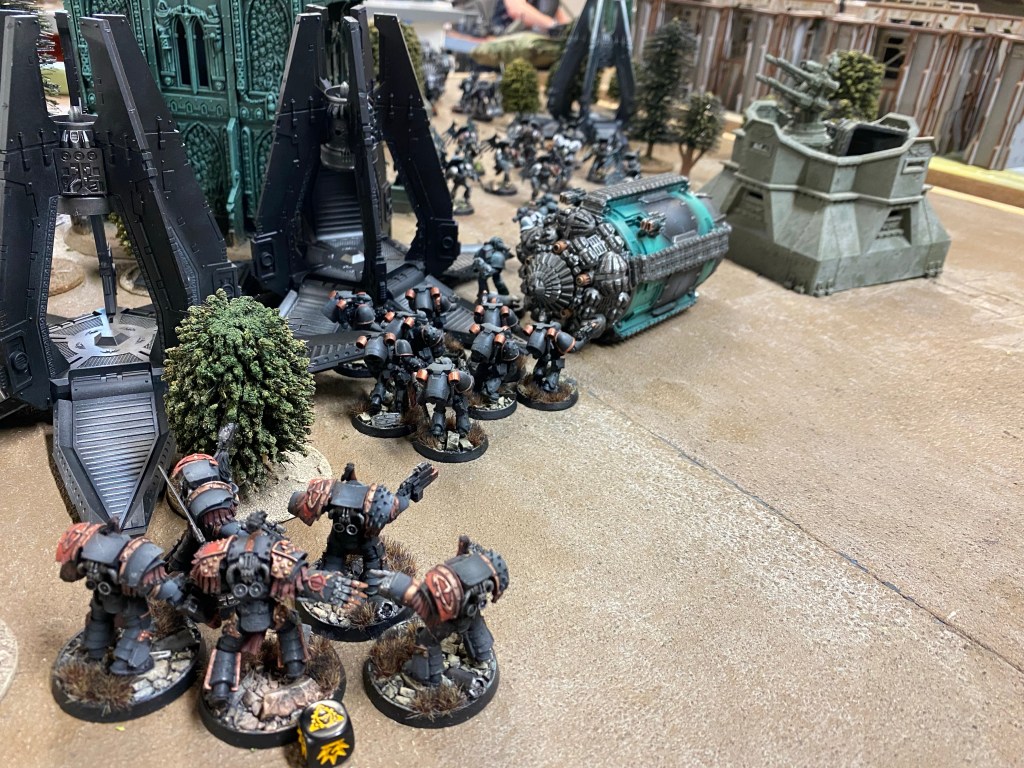
Sons of Horus
Rite of War: Pride of the Legion.
HQ:
Chaplain [127pts]: On Foot, Power Axe
. Cataphractii Pattern Terminator Armour: Terminator Armour
. Combi-weapon: Combi-weapon: Plasma gun
. Consul
. . Chaplain
Ezekyle Abaddon [215pts]: Power Sword
Elites:
Destroyer Squad, Legion [300pts]: Chainswords & Combat Blades, 9x Destroyer Space Marine, Legion, Hardened Armour, Jump Pack, Missile Launcher with Suspensor Web and Rad Missiles Only, Missile Launcher with Suspensor Web and Rad Missiles Only
. Destroyer Sergeant, Legion: Artificer Armour, Power Axe
Troops:
Justaerin Terminator Squad [555pts]: Chainfist, 10x Combi-Plasma, 10x Justaerin Terminators, 5x Power Axe, 4x Power Fist
Justaerin Terminator Squad [580pts]: Chainfist, 10x Combi-Plasma, 10x Justaerin Terminators, 9x Power Fist
Veteran Tactical Squad, Legion (Compulsory) [280pts]: 9x Bolt Pistol, 9x Chainswords/Combat Blades, 7x Combi-weapon: Plasma gun, 2x Plasma gun, 9x Veteran Space Marines, Legion, Veteran Tactics: Machine Killers
Veteran Sergeant, Legion: Artificer Armour, Bolt Pistol
Chainsword or Combat Blade: Chainswords/Combat Blades
Combi-weapon: Combi-weapon: Plasma gun
Fast Attack:
Terrax Pattern Termite Assault Drill: 2x Twin-linked Volkite Charger [100pts]
Terrax Pattern Termite Assault Drill: 2x Twin-linked Volkite Charger [100pts]
Terrax Pattern Termite Assault Drill: 2x Twin-linked Volkite Charger [100pts]
Heavy Support:
Deredeo Pattern Dreadnought [290pts]: Aiolos Missile Launcher, Armoured Ceramite, Single Arachnus heavy lascannon battery, Twin-linked Heavy Bolter
Deredeo Pattern Dreadnought [290pts]: Aiolos Missile Launcher, Armoured Ceramite, Single Arachnus heavy lascannon battery, Twin-linked Heavy Bolter
Lords of War:
Horus the Warmaster [500pts]
Primarch: Warlord
Total: [3,997pts]

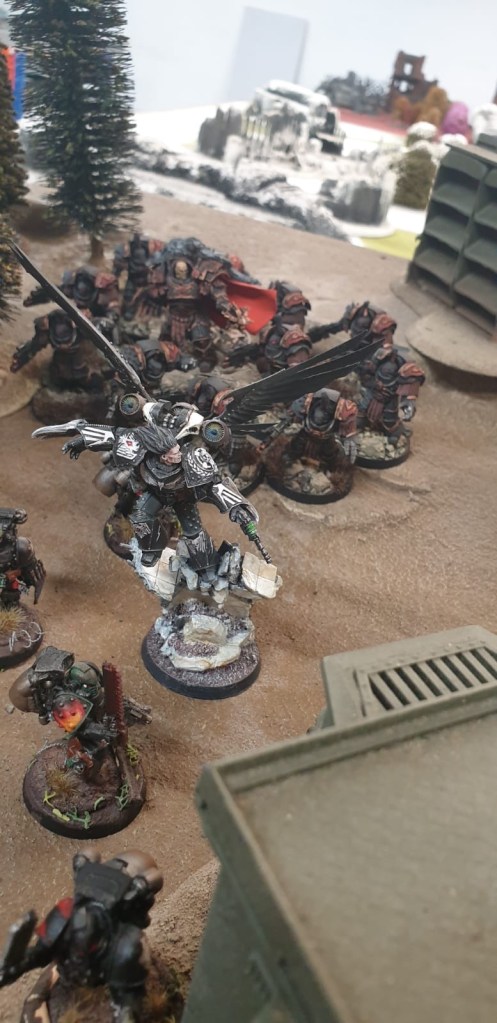
Raven Guard
Rite of War: Decapitation Strike
HQ:
Chaplain [115pts]: Artificer Armour, Boarding Shield, Bolt Pistol, Cameleoline, Melta Bombs, On Foot, Power Weapon
Chainsword or Combat Blade: Combat Blade
Consul
Chaplain: Power Maul
Damocles Command Rhino [110pts]: Dozer Blade, Extra Armour
Praetor, Legion [165pts]: Artificer Armour, Bolt Pistol, Jump Pack, Melta Bombs, Raven’s Talons, Refractor Field
Strike Captain Alvarex Maun [140pts]
Elites:
Contemptor Dreadnought Talon [215pts]
Contemptor Dreadnought, Legion: Extra Armour, Kheres Pattern Assault Cannon
Dreadnought Close Combat Weapon: Plasma Blaster
Deathstorm Drop Pod [115pts]
Mor Deythan Strike Squad [404pts]: Artificer Armour, 7x Combi-weapon, Infravisor, Melta Bombs, 9x Mor Deythan, 3x Plasma gun
.Rhino Armoured Carrier, Legion: Dozer Blade, Multi Melta
Mor Deythan Strike Squad [299pts]: Artificer Armour, 7x Combi-weapon, Infravisor, Melta Bombs, 6x Mor Deythan
.Rhino Armoured Carrier, Legion: Dozer Blade, Multi Melta
Troops:
Assault Squad, Legion , Compulsory [280pts]: 9x Assault Space Marines, Legion
Additional Wargear: Melta Bombs, Power Maul
Assault Sergeant, Legion: Artificer Armour, Melta Bombs, Plasma Pistol, Raven’s Talons
Tactical Squad, Legion , Compulsory [235pts]: 9x Tactical Space Marines, Legion
Additional Wargear: Additional Chainswords/Combat Blades, Nuncio-vox, Vexilla, Legion
Drop Pod, Legion
Tactical Sergeant, Legion: Artificer Armour, Infravisor, Melta Bombs, Power Fist
Tactical Support Squad, Legion Flamer [196pts]: Flamer, Support Squad
Additional Wargear: Take an additional Chainsword or Combat Blade
Drop Pod, Legion
Sergeant, Legion: Bolt Pistol, Flamer
7x Space Marines, Legion: 7x Bolt Pistols, 7x Frag and Krak Grenades, 7x Power Armour
Tactical Support Squad, Legion Meltagun [240pts]: Meltagun, Support Squad
Additional Wargear: Take an additional Chainsword or Combat Blade
Drop Pod, Legion
Sergeant, Legion: Artificer Armour, Bolt Pistol, Infravisor, Melta Bombs, Meltagun
4x Space Marines, Legion: 4x Bolt Pistols, 4x Frag and Krak Grenades, 4x Power Armour
Fast Attack:
Dark Fury Assault Squad [330pts]: 9x Dark Fury
Chooser of the Slain: Melta Bombs
Primaris-Lightning Strike Fighter [265pts]: 3x 2x Kraken Penetrator Heavy Missiles, Battle Servitor Control, Ground-tracking Auguries, Twin-linked Lascannon
Seeker Squad, Legion [315pts]: 9x Seeker Space Marines, Legion
Additional Wargear: 9x Combi-weapon: Plasma gun
Drop Pod, Legion
Strike Leader, Legion: Artificer Armour, Infravisor, Melta Bombs
Combi-weapon: Combi-weapon: Plasma gun
Heavy Support:
Deathstorm Drop Pod [115pts]
Lords of War:
Corvus Corax [450pts]
Total: [3,989pts]

Deployment:
The Traitor forces won the roll-off and deployed under the mission rules (Lord of War – Alternating, Heavy Support- Alternating, Remainder of the army – Alternating). This saw a reversal in the usual scenes of Raven Guard vs a more conventional army – with only two Sons of Horus Deredeo Dreadnoughts deployed. The Raven Guard had several Rhinos with Mor Deythan Plasma Squads infiltrate in, whilst the Command Rhino, Corax, an Assault Squad, Maun and a Contemptor started on the table.
When it came time to play the first turn, the Sons of Horus won the roll-off, and the Raven Guard failed to seize the initiative, even with a re-roll. As per mission rules, the Sons of Horus could choose to go first or second and chose to open proceedings themselves in Turn One.
Turn 1:
Neither of the Deredeo Dreadnoughts moved, and both declared their Helical Targeting Arrays active. The centremost Deredeo opened up on the Raven Guard Damocles Command Rhino, hitting with one 6+ (and an exoshock after penetrating) and exploding it with its Arachnus Lascannons and removing a large portion of the Assault Squad that was next to it through the Rhino’s explosion. The Deredeo on the right flank failed to land any of its shooting at the Raven Guard Contemptor Dreadnought. Two of the total three Terrax Drills popped up close to the Raven Guard Mor Deythan Rhinos as part of Subterranean Assault. The Sons of Horus Machine Killer Veteran Squads jumped out of each and destroyed both Rhinos with burning plasma shots. The Rhinos subsequently exploded. As they were violently debussed, both Mor Deythan squads suffered Pinning, meaning they were snap shooting in their turn. The combined effects of the explosion and the twin-linked Volkites on the Terrax killed the vast majority of one squad of Mor Deythan and 1/3 of the second squad.
The Raven Guard retaliated by dropping in a Drop Pod with a Tactical Support Squad (Flamers) into the furthest forward Sons of Horus Veteran Tactical Squad, murdering all but one of them (the Sergeant) in a brutal retaliation. A second Drop Pod, containing a Tactical Squad, came down near the Sons of Horus deployment zone, next to the other Sons of Horus Veteran Tactical Squad, killing four of them. A third Drop Pod came in ahead of the Deredeo Dreadnought on the right flank. This was successfully intercepted, with the explosion killing three of the five Tactical Support Squad (Meltaguns). The Tactical Support Squad retaliated by taking the Deredeo down to 1HP; Armoured Ceramite saving it from being wiped from the table. Finally, a Deathstorm Drop Pod came down in front of the centremost Deredeo, but was successfully intercepted by its Arachnus Lascannons. Corax and the remainder of his Assault Squad (not attached to the unit, merely bubble wrapped by it) bounded forwards on the right flank into an open area to react to the Sons of Horus Veteran Tactical Squads pushing the left flank.
The opening fusillades were highly effective from both sides, setting the scene for a bloody exchange.

Turn 2:
Reserves were rolled for the Sons of Horus, with the third Veteran Tactical Squad being unsuccessfully rolled for. Fortunately, Abaddon and his Justaerin, the Destroyer Squad and Horus and his Justaerin were successful. Abaddon and his Justaerin arrived close to the Raven Guard deployment zone and the ongoing battle with the Tactical Support Squad with Flamers. They offloaded five combi-plasma into the remainder of the Mor Deythan Squad (the rest could not see) killing them outright. Horus dropped on the far right flank of Corax, with the destroyers dropping in on the left flank of Corax… The trap had been sprung! The Destroyer Squad killed the remains of the Assault Squad bubble wrapping Corax and the Justaerin with Horus poured plasma fire into him – removing him from the table and scoring additional VP.
The Raven Guard dropped in a further Drop Pod with a Combi-Plasma Seeker Squad next to Abaddon and his Justaerin, and were successful at getting in their Dark Fury, Chaplain and Praetor squad in the open ground between both Terrax Termites. This was to prevent the third Termite from coming up in that area and denying the ability for the Sons of Horus to reinforce the middle of the left flank through to the Raven Guard deployment zone. Unfortunately for the Raven Guard, they were unsuccessful at bringing on the Primaris Lightning and the final Deathstorm Drop Pod.
The Seeker Squad engaged and killed six Justaerin with their combi-plasma; with the remainder of them saved by a genuinely shocking amount of invulnerable saves being made by the Sons of Horus. The Tactical Squad that dropped in on the previous turn killed a few more Sons of Horus Veterans through ranged fire and charged into them, killing a further one; reducing that Squad to just four members strong. Finally, the Raven Guard Contemptor charged the centremost Deredeo Dreadnought, scoring two hits, two wounds – but carrying on the theme of shockingly good saving throws, the Sons of Horus managed to roll two 6+ invulnerable saves in melee.
The Raven Guard alpha strike was dead and buried at this point, leaving the only option of clearing their deployment zone and trying to move scoring units into the Sons of Horus deployment.
Turn 3:
Turn three saw the Sons of Horus fail to bring on their remaining Terrax Termite. Instead, Horus moved into the Raven Guard deployment zone with his Justaerin and the Terrax Termite that brought up the centremost Veteran Tactical Squad moved to block the path of the Dark Fury Squad. The right flanking Deredeo killed the lone Tactical Support Squad (Meltagun) marine with its Aiolos and killed Maun with its Arachnus Lascannons. The Sons of Horus Destroyer Squad used their jump packs to cross the distance to the Raven Guard Seekers and charged them along with Abaddon and his Justaerin in a pincer movement that saw the Seeker Squad destroyed outright. The Destroyers then moved to get closer to the Tactical Support Squad (Flamers), whilst Abaddon and the Justaerin stayed in the Raven Guard deployment zone.
The Raven Guard brought in their final Deathstorm Drop Pod next to their Tactical Squad, well within the Sons of Horus deployment zone, unfortunately, its automated systems killed the Tactical Squad Sergeant and another member of the squad. It did however take the Terrax Termite in the Sons of Horus deployment zone down to just one HP remaining. The Tactical Squad near the Sons of Horus deployment zone killed the Sons of Horus Veteran Squad and began to move towards the Sons of Horus deployment zone to secure VP. The Dark Fury squad found themselves channelled and were unable to get a charge off on Abaddon and the Justaerin, failing by just one inch. The Contemptor Dreadnought was locked in combat with the Deredeo, unfortunately whiffing its rolls. The Primaris-Lightning shot three Krakens and a Lascannon at the right flanking Deredeo, but whiffed one missile and the Deredeo rolled some solid invulnerable saves against the rest of the penetrations.
The Raven Guard needed to remove both the Terrax Termite and the two Deredeos from the Sons of Horus deployment, whilst aiming to remove Abaddon and the Justaerin from their own deployment zone. They made significant inroads to this and had moved into position, ready for a turn 4 charge into Abaddon to be successful.
During this turn, Corax was brought back into play, facing off against Horus as a bit of fun in their deployment zone. Corax elected for the -1 to hit ability from his Panoply and took two wounds from Horus, whilst suffering three himself.
Turn 4:
The final Terrax Termite arrived automatically for the Sons of Horus and came up in the Raven Guard deployment zone in a danger-close Subterranean Assault. The Veteran Tactical Squad opened up with their fresh plasma weapons into the Dark Fury squad, killing the attached Praetor, and a significant portion of Dark Furies. The Terrax Termite in the Sons of Horus deployment zone Tank Shocked the Raven Guard Tactical Squad pushing them back out of the deployment zone. The right flanking Deredeo, having stayed static, activated the Helical Targeting Array for the final time and destroyed the Primaris-Lightning. In some cinematic, narrative moment, Horus called in a lance strike on the Raven Guard Contemptor and the Sons of Horus Deredeo; unfortunately, Horus managed only to destroy the Deredeo, though one HP was removed from the Contemptor.
The Raven Guard Tactical Squad destroyed the Terrax in the Sons of Horus deployment zone in melee and consolidated further into it. The remaining Dark Furies and Chaplain charged into and killed the recently arrived Veteran Tactical Squad, looking to bounce into Abaddon in the next turn and clear their deployment zone. The Tactical Support Squad (Flamers) killed all but two of the Sons of Horus Destroyer Squad – however, they stood firm.
During this turn, in the separate out of game challenge, Corax elected for D3 additional hits and managed to bring Horus down a further two wounds. Horus managed to take only one wound from Corax, having a horrific set of rolls that failed to translate. This wound was from the Warmasters Talon, seeing Corax reduced by -1S and WS for the rest of the game.

Turn 5:
The turn started with the Sons of Horus looking to counter the Raven Guard in their own deployment zone. Abaddon, his Justaerin and the remaining Destroyers moved and charged into the Raven Guard Dark Furies and Chaplain. Abaddon and the Chaplain entered into a challenge, with the Raven Guard Chaplain striking first due to Abaddon electing to use his Power Fist. Abaddon was on one wound remaining, which made this a dangerous gambit. Luckily for the Sons of Horus, of the four wounds scored against Abaddon, he made all his saves and went on to murder the Chaplain for his temerity. The Justaerin killed the remaining Dark Furies, losing one of their own in return.
The Raven Guard first looked to shoot at, and then charge the Sons of Horus Deredeo in the Sons of Horus deployment zone. Unfortunately, the Kheres Assault Cannon failed to glance the Deredeo and in melee, the Contemptor whiffed its hits. The Tactical Support Squad (Flamers) couldn’t get close enough to Abaddon and the remaining Justaerin. The Tactical Squad moved deeper into the Sons of Horus deployment zone.
This left the battle between Corax and Horus raging. Corax elected for -1 to hit again and managed to get Horus down to one wound due to a horrific amount of terrible saving throws. Horus put two attacks into the Talon and four attacks on Worldbreaker, with the latter four attacks killing Corax.
With that, the game ended.

Results:
Sons of Horus
7VP for Horus Lupercal in Raven Guard deployment zone.
14VP for 2x Troops choices in Raven Guard deployment zone.
2VP for a Heavy Support Choice in the Sons of Horus deployment zone.
1VP for First Blood.
1VP for the Price of Failure.
1VP for Slay the Warlord
Total = 26VP.
Raven Guard
7VP for Troops choice in Sons of Horus deployment zone.
7VP for Heavy Support choice in Sons of Horus deployment zone.
Total = 14VP.
Summary:
A brutal game with several key moments defining it for the Raven Guard.
- The debussing and pinning of the combi-plasma Mor Deythan; The Raven Guard were immediately on the back foot with the pinning result. The Terrax Termites offer vital tactical flexibility here that Rhinos simply could not match, able to bring in devastating firepower in reaction to the infiltration. The Raven Guard were unable to murder the Veteran Squads in subsequent turns due to the pinning effect they suffered.
- The elimination of the Assault Squad and the plasma-death of Corax; plasma has killed two Primarchs in the last three games. Though Sanguineous and his Assault squad were exceptionally good at rolling Feel No Pains and took a higher percentage of wounds to kill. Unfortunately for the Raven Guard, Corax had to be used to respond to the threat of the Veteran Tactical Squads, forcing him forwards into an open area. This coupled with the reserve rolls for the Destroyer Squad meant that his bubble wrap could be stripped prior to Horus and the Justaerin opening up on him.
Though these moments didn’t condemn the Raven Guard in-game, they stole the initiative from them, forcing reaction instead of alpha strikes. The decapitation strike they aimed to deliver never occurred as a result.
The Sons of Horus didn’t have an easy game, far from it. They were reliant on tactical decisions delivering effect at key moments. The third Veteran Tactical Squad not coming in on Turn 2 almost caused the failure of the gambit for Corax – with the last bolt pistol and Deredeo missile delivering the required effect. The Sons of Horus also had the vast majority of their army (points-wise) drop and stand around for the majority of the game; with Horus and the Justaerin entirely unopposed in the Raven Guard deployment zone. This decision to simply ignore them was superb – as although they would score 14VP, the Raven Guard did almost clear Abaddon and his Justaerin from the Raven Guard deployment Zone and if the Contemptor hadn’t whiffed, would certainly have killed the Deredeo Dreadnought left in the Sons of Horus deployment zone. That would have brought the scores to 17VP to 14VP.
It goes to show that games in the Horus Heresy often come down to a few dice rolls and that even when there appears to be a significant gap between the results; it’s often a false indicator.
It is always lovely to see the Raven Guard on the table – from @WaldoWolski (Instagram) and they represent a unique challenge to fight in their current form. My own Instagram @havoc1856 has more shots of the armies and various other projects.
Thanks to 4TK Gaming for hosting us! Their tables aren’t set up in typical ITC format, featuring more of a random pattern to the terrain. As such they’re always fun to play on and offer a vast range of options for your battles. Andy (the owner of 4TK) is looking forward to Heresy 2.0 and will be keenly delving into it on launch, so stay tuned to their website for events to come online.

