Details:
Date: 16 Jan 22
Points Limit: 16,000pts (4,000pts per player)
Mission: Objective Secured, Slay the Warlord, Price of Failure
Timeframe: 1100-1800
Location: 4TK Gaming, Davey Close, Colchester
Narrative:
Traitor forces have landed relatively unopposed on Rostok-8 after a short campaign of deception by the Warmaster against the Imperial defence fleet.
Rostok-8 is dominated by an Imperial Research Station on the outskirts of the Sol system, identified in records as having played a significant part in the development of Warp weaponry and has a deactivated Webway gate under the primary laboratory.
The Warmaster’s targets are the Primary Laboratory, a containment generator and a data centre. With this in his control, he aims to reach out through the Webway gate and further weaken the Emperors tenuous control over it.
A fleet of Raven Guard led by Corax attempting to return to the Sol system spearheads a strike back against the Warmaster – eager to at stave off the impending strike into the Sol system by traitor forces. Malcador, under the direction of the Emperor, has prepared and released fleet support to move a force of Custodes led by Valdor to support the battered Raven Guard forces.
Traitors:
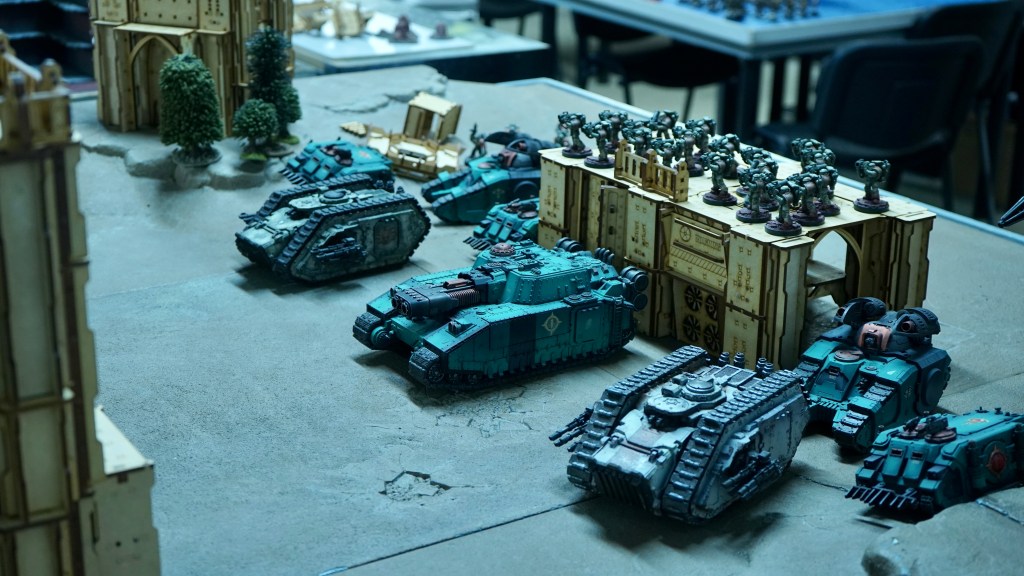
Sons of Horus
Death Guard
Loyalists:
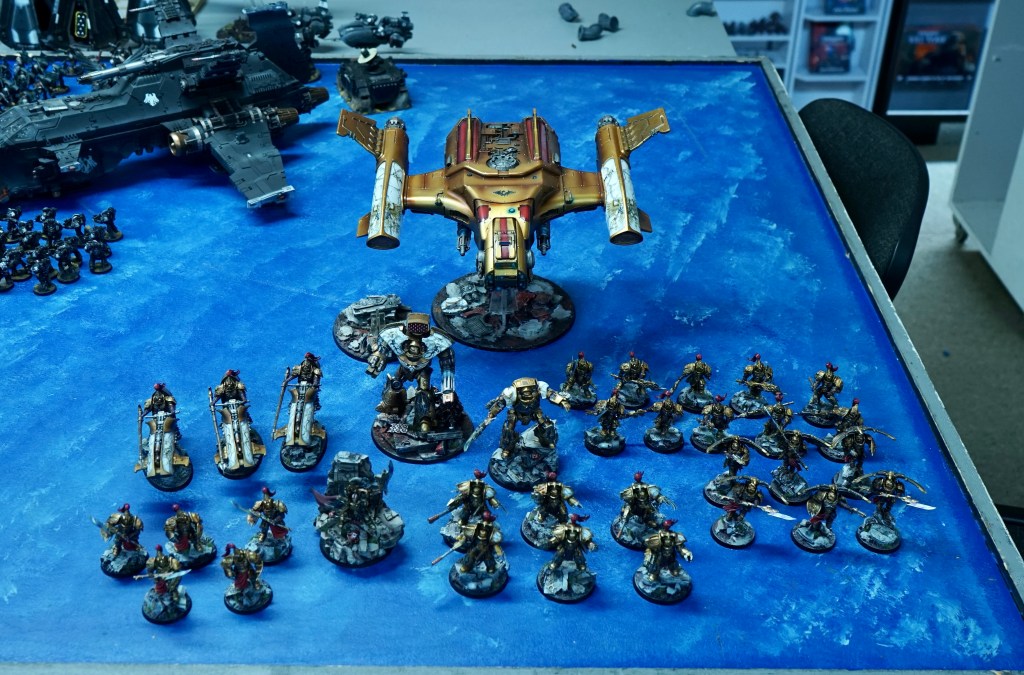
Raven Guard
Custodes
Army Lists:
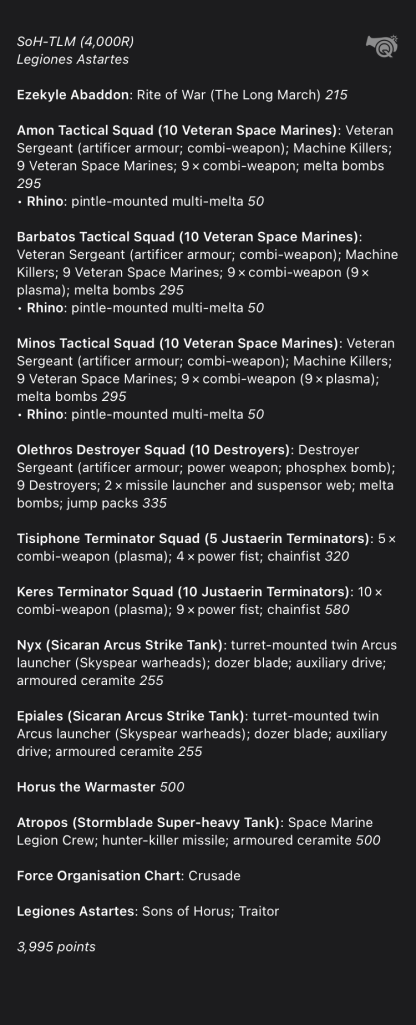
Sons of Horus
Death Guard


Raven Guard
Chaplain [125pts]: Artificer Armour, Boarding Shield, Bolt Pistol, Jump Pack, Power Weapon
Chainsword or Combat Blade: Combat Blade
Consul
Chaplain: Power Maul
Contemptor Dreadnought Talon [215pts]
. Contemptor Dreadnought, Legion: Extra Armour, Kheres Pattern Assault Cannon
. . Dreadnought Close Combat Weapon: Plasma Blaster
Mor Deythan Strike Squad [360pts]: Artificer Armour, 10x Combi-weapon, Infravisor, Melta Bombs, 9x Mor Deythan
Rhino Armoured Carrier, Legion
Mor Deythan Strike Squad [306pts]: Artificer Armour, 8x Combi-weapon, Infravisor, Melta Bombs, 7x Mor Deythan
Rhino Armoured Carrier, Legion
Veteran Tactical Squad, Legion [230pts]: Combat Blade, 10x Combi-weapon: Plasma gun, Power Axe, 9x Veteran Space Marines, Legion, Veteran Tactics: Resolve
Drop Pod, Legion
. Veteran Sergeant, Legion: Artificer Armour, Bolt Pistol, Combi-weapon, Infravisor
Assault Squad, Legion , Compulsory [235pts]: 9x Assault Space Marines, Legion
Additional Wargear: Power Maul
. Assault Sergeant, Legion: Artificer Armour, Melta Bombs, Pair of Raven’s Talons, Plasma Pistol
Chainsword or Combat Blade: Combat Blade
Tactical Squad, Legion , Compulsory [150pts]: 18x Tactical Space Marines, Legion
.Tactical Sergeant, Legion: Artificer Armour, Power Fist
Tactical Support Squad, Legion Meltagun [210pts]: Meltagun, Support Squad
.Drop Pod, Legion
.Sergeant, Legion: Bolt Pistol, Meltagun
. 4x Space Marines, Legion: 4x Bolt Pistols, 4x Frag and Krak Grenades, 4x Power Armour
Dark Fury Assault Squad [330pts]: 9x Dark Fury
.Chooser of the Slain: Melta Bombs
Javelin Attack Speeder Squadron, Legion [110pts]
Javelin Attack Speeder, Legion: Heavy Bolter, Twin-linked Cyclone missile launcher
Javelin Attack Speeder, Legion: Heavy Bolter, Twin-linked Cyclone missile launcher
Primaris-Lightning Strike Fighter [265pts]: 3x 2x Kraken Penetrator Heavy Missiles, Battle Servitor Control, Ground-tracking Auguries, Twin-linked Lascannon
Deathstorm Drop Pod [115pts]
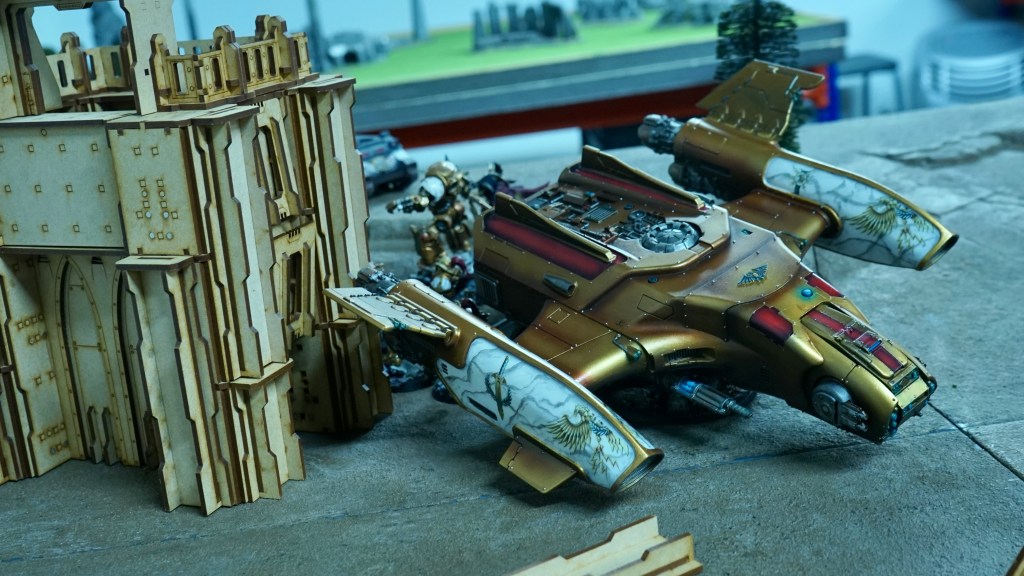
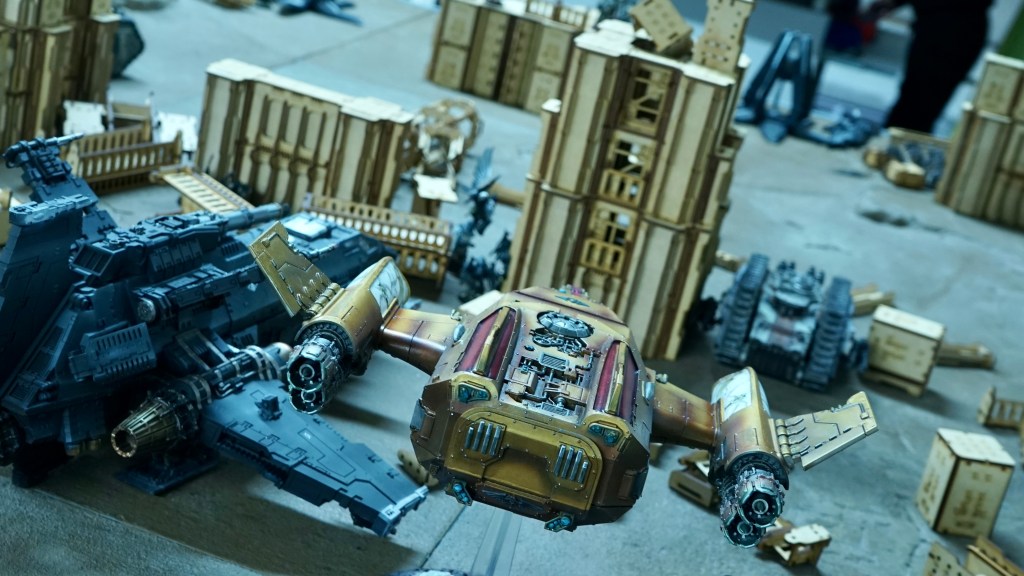
Thunderhawk Gunship, Legion [700pts]: Void Shields (1), Turbo Laser Destructor, Void Crafted Hull, It Will Not Die, Six Hellstrike Missiles, Four sponson mounted twin-linked heavy bolters, Armoured Ceramite, Chaff Launcher.
Corvus Corax [450pts]
Rite of War: Decapitation Strike

Custodes
Constantin Valdor 325 (Acting as the Loyalist Warlord for “Slay The Warlord”)
6 Custodian Guards: 2 × Pyrithite spear 360
5 Custodian Guards: 5 × Adrasite spear; teleportation transponders 350
5 Sentinel Guards: 2 × Solarite power gauntlet 315
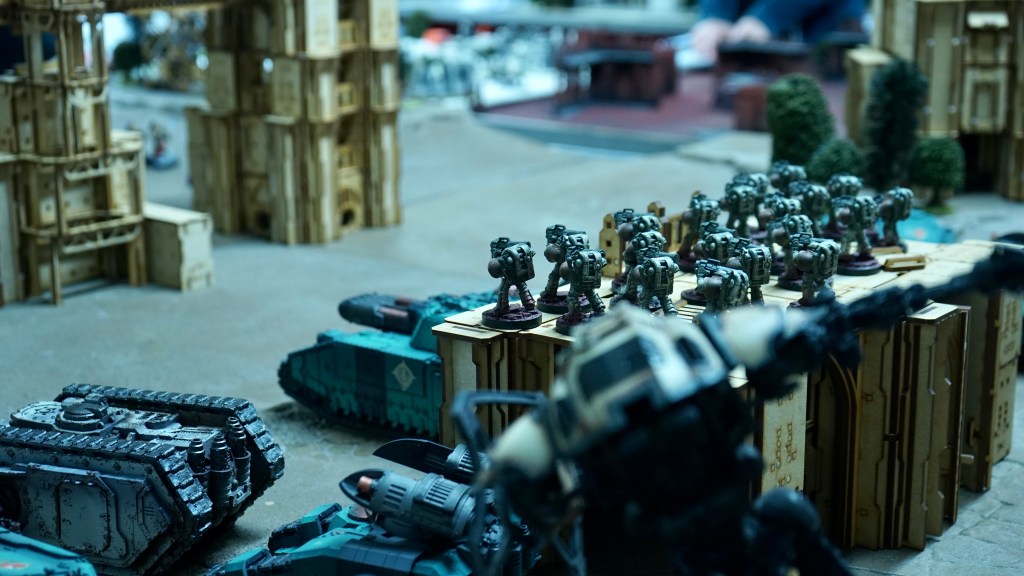
6 Aquilon Terminators: 3 × twin-linked Adrathic destructor; 3 × Infernus firepike; 3 × Solarite power talon 570
Legio Custodes Contemptor-Achillus Dreadnought: 2 Dreadnought close combat weapons (2 × twin-linked Adrathic destructor); Achillus dreadspear 305
6 Custodian Venatari: 3 × Venatari lance; melta bombs 465
3 Custodian Agamatus Jetbikes: Legio Custodes Gyrfalcon Jetbike (3 × twin-linked Corvae las-pulser) 330
Legio Custodes Telemon Heavy Dreadnought: Arachnus storm cannon 360
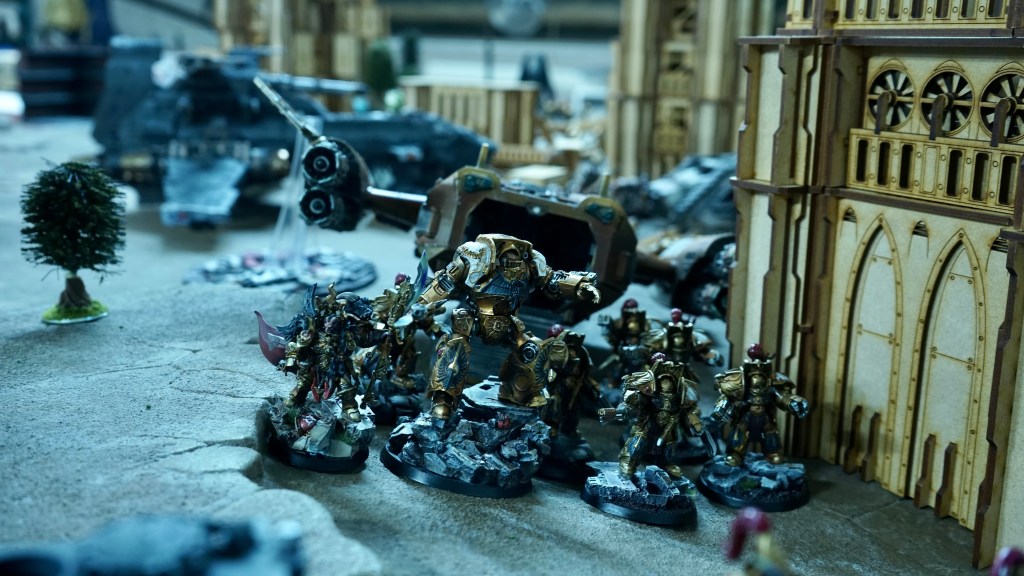
Legio Custodes Orion Assault Dropship 615
Deployment:
The Traitor forces won the roll-off and deployed fully first. They took up positions fairly aggressively, whilst still covering off 18″ of deployment rear to stop enemy infiltrators from taking up those positions. Due to the nature of their forces, the Raven Guard and Custodes were light on the ground initially, with only three Custodes units on the table and a similar number of Raven Guard.
The Raven Guard then infiltrated several units into the primary objective in the centre of the table. This left the bulk of their armies in the Lord of War Fliers and a few additional platforms in reserve.
Turn One:
No seize was made, so the Traitors began by pushing the Sons of Horus up aggressively. The aim was to deny freedom of movement and either damage, shake or destroy as much as possible to prohibit significant return fire from coming in from those assets already on the table. As such, the Sicaran Arcus took up positions on the left and right flank, with supporting Rhinos from the Sons of Horus, whilst the Stormblade rolled forwards in the centre. The Death Guard forces took to the flanks, with a Spartan on each.
The initial opening fusillade from the Sons of Horus and Death Guard was highly effective. The Mor Deythan squads on the centre objective were forced to go to ground, the Telemon was shaken and the Custodes bikes were forced to jink, thus limiting the potent return fire. The Stormblade opened up on the Raven Guard Assault squad, killing all but two of them.
A Raven Guard Deathstorm Drop pod entered in danger close to the Death Guard heavy support squads and was destroyed, with the Death Guard forces losing two models in return. This left the Drop pod with a Raven Guard Meltagun squad to enter virtually unopposed behind the Malinax Knight Lancer. Consequently, this was reduced to one wound remaining as the Lancer cannot rotate its shield to the rear. Fire coming in from the Custodes jetbikes still took one wound from the Sicaran Arcus on the right flank and a Raven Guard Contemptor took a wound from the lead Sons of Horus Rhino on the left flank.
Overall, the turn was a bloody exchange with the Traitors taking the early upper hand as expected, though the slide into a difficult game had started and was about to get steeper.

Turn Two:
Turn two saw the traitors mostly stay static or shuffle for clearer sightlines. The Arcus tanks remained static, with the left flank having significantly worse sightlines than the right. The Telemon fell to concerted fire from the left flank Arcus and the lead Rhino.
The Left flanking Death Guard Spartan opened up on the Raven Guard Contemptor Dreadnought and scored two HP from it. The Grave Wardens and Typhon dismounted their Spartan on the right flank and killed the Mor Deythan squad with their horrific amount of small blast poison shots a fair few times over. The other Custodes Jetbikes also fell to directed fire from the remaining assets on the right flank.
Abaddon and five Justaerin deep struck at the Loyalist deployment objective and used their Combi-plasma on the Custodes holding the objective, only killing one, despite being in range for Death Dealers. The Sons of Horus Destroyer squad deep struck alongside them and missed what they shot at the Raven Guard Command Rhino.
The Loyalists rolled for reserves and the Raven Guard managed to bring in their Thunderhawk Gunship, Primaris-Lightning, Javelin attack speeders and their Drop Pod with Machine Killer Plasma Veterans. They also managed to outflank a squad of Flamer Mor Deythan next to Abaddon, his Justaerin and the Destroyers.
The Primaris-Lightning opened up proceedings and took off 3 HP from the Stormblade – however, the Thunderhawk took a further 2 HP from it. Bolters from the pylons on its wings also took down two of the Grave Wardens.
The Raven Guard Javelins killed the Knight Lancer which had turned and killed the remaining Melta gunners and the Machine Killer Plasma Vets killed the Sicaran Arcus on the right flank.
The Custodes deep struck next to the Traitor deployment objective, ready to attempt to wrest away control of it and the Venatari reinforced the Loyalist deployment Objective. Finally, the Mor Deythan, shooting through the Justaerin at the Destroyers, removed the Destroyer Squad wholesale and two Justaerin. That’s a 360pt squad, killing off 387 points in a single turn of shooting – a great return. The Custodes then charged the Justaerin, leaving just Abaddon and a single Justaerin, who did no damage in return.
Overall with a VP already given away with the loss of the Lancer, one AA asset remaining, another Lord of War airframe still yet to arrive and the Stormblade marked for death in the following turn, the writing was pretty much on the wall.

Turn Three:
Significant thought was put into the turn prior to conducting any moves. The situation was dire and although the Death Guard were mostly untouched, the heavier firepower in the armies was not going to last turn three. Hence, it was a turn of maximising the potential output of all assets before their inevitable destruction.
The Stormblade moved forwards (a little too far in the end) and overcharged a shot onto the Venatari, killing half of them. The remaining Sicaran Arcus ripple fired its shots into the Primaris-Lightning, killing it. The left flank Death Guard Spartan moved up the table a little further and attempted to kill the Raven Guard Contemptor, but couldn’t remove its last HP.
The Loyalists outflanked a further 19 man Raven Guard Tactical Squad onto the Traitor deployment objective, complicating the battle in that area, whilst the melee continued on the Loyalist deployment objective. This saw the final Justaerin fall and leave Abaddon by himself. Although he couldn’t do damage back to the Custodes, he only failed one invulnerable save; importantly prolonging the combat.
The Custodes in the Traitor deployment objective killed the Death Guard Tactical Squad on the ground level and looked to get in and charge the remaining Tactical Squad on the top floor of the objective. The Raven Guard Dark Furies and Corvus Corax dismounted the Thunderhawk Gunship and set up to charge the Stormblade. The Thunderhawk scored more hits on the Stormblade, leaving it with 1HP remaining. Corax and the Dark Furies then charged in and took the final HP. The Stormblade suffered a Catastrophic Explosion, killing most of the Dark Furies and wounding Corax.
The Custodes Orion arrived from reserves and took 3HP from the remaining Sicaran Arcus, killing it outright.
Overall, with no AA, there was no real way of taking down the Lords of War when they were flying and thus, it gave total control of the game to the Loyalist forces. Horus and ten Justaerin remained off the table at this point, waiting to see where best to deploy for effect, such was the state of the game for the Traitors.
Turn 4:
Traitors started turn 4 by consolidating forces. The remaining few Dark Furies were killed by the Death Guard Heavy Support squads. This meant that the Sons of Horus Veteran Squads could step out from the side of the centre objective and unleash plasma at Corax. They removed all but one wound, even with rapid firing and taking advantage of the Death Dealers rule. As with the Custodes on the Loyalist deployment objective on a previous turn, the saving rolls were very good.
The Death Guard Spartan that Typhon and the Grave Wardens had remounted in the previous turn moved back towards the dire scene that was playing out in the Traitor deployment objective zone, as did a Sons of Horus Rhino with Veterans inside. The Veterans dismounted and opened up with Combi-plasma, again with Death Dealers, onto the Custodes killing just two of them. The Grave Wardens split from Typhon and killed one more Custodian, leaving one standing alone. Typhon used his hand flamer on the Raven Guard Veteran Squad, killing one.
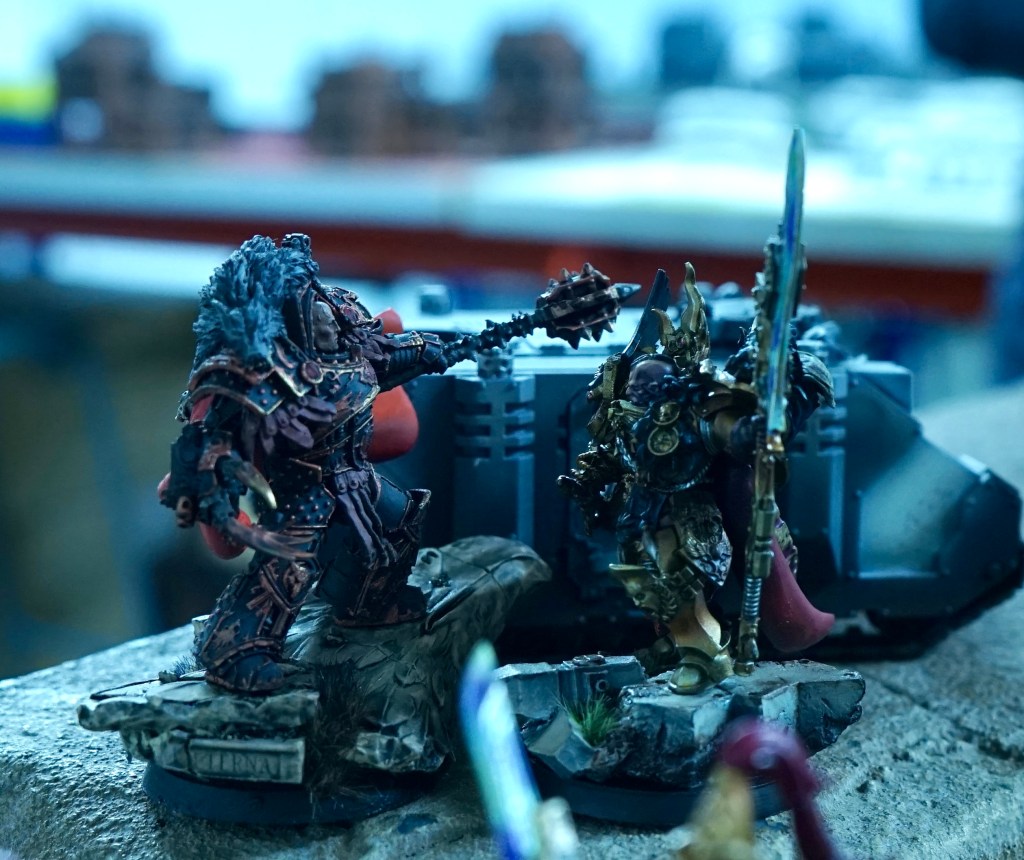
Mortarion and the Deathshroud dismounted the Spartan behind Corax and lined up to charge. Unfortunately, they failed their charge rolling a seven where an eight was required. Papa Nurgle be damned.
Horus had to arrive this turn, so dropped in with ten Justaerin to reinforce his 1st Captain. The squad proceeded to kill the Mor Deythan Squad that was on the Objective. Abaddon unfortunately fell, and the Custode forces consolidated towards Horus and the Justaerin.

The Custodes had a tactical conundrum to consider; do they dismount the Orion and attack the centre objective and kill Mortarion, or remove the Justaerin and Horus from the Loyalist deployment objective? It was a difficult decision, especially with two Spartans rolling around near the middle and in direct line of sight to the Death Guard Heavy Support Squads. In the end, they dismounted the Orion and set up the charge into Horus, after firing and whittling down the Justaerin.
Horus and Valdor fought in a challenge, whilst the Aquilon Terminators, the Custodian Guard and the remaining Venatari charged in and fought the remaining Justaerin. The Custodes Contemptor failed its charge. Horus split his attacks between the Talon and Worldbreaker, scoring no wounds with the Talon, but getting through two wounds on Valdor, who did two wounds back to Horus in reply. Effectively, Valdor did a great job starting off, considering how much less he costs. The Justaerin were further whittled down during melee, leaving just five remaining.
The Raven Guard tactical squad at the Traitor deployment objective killed more of the Death Guard Tactical Squad and the Grave Wardens were killed to a man by a deep striking Custodes squad equipped with Adrathics and the Heavy bolter from the Raven Guard Javelin. Corax moved away from Mortarion and the Deathshroud, whilst the Thunderhawk pivoted but remained in hover. The reason for this was to block the progress of Mortarion and his cohort, and it also fired all it had at them; killing all of the Deathshroud and taking a wound from Mortarion.
Overall the turn didn’t change the outlook for the Traitors, instead seemingly sealing their fate.
Turn 5:
With the Raven Guard Thunderhawk still on the ground, being used to block Mortarions advance on Corax and seemingly stuck in an ever devolving situation, the traitors simply opened up with anything that could see and fire at the Thunderhawk. In the end, it came down to the last missile fired, but it did indeed blow up; suffering a Catastrophic explosion. This explosion caught Corax, who on one wound died to it.
With the mushroom cloud of the Thunderhawk in the background, Horus and Valdor fought on, with Horus wounding Valdor another time. Two Justaerin died to the Custodes and took two Aquilon Terminators with them for their troubles. Typhon charged into the Raven Guard Veteran Squad and killed two.
Overall, the turn marks a dynamic change for the Traitors who were now back in the running for at least a draw or a win if they could also kill Valdor. The sixth turn was rolled for and went ahead.
Turn 6:
The second Sons of Horus Veteran Squad on the primary objective tucked themselves into a defensive position, with the remaining Veterans Squad on the Traitor deployment objective attempting to further whittle down the Raven Guard Tactical Squad. The Custodes charged into Typhon and the Raven Guard Veteran Squad.
Horus killed Valdor and found himself stuck in the middle of a fight with a Custodes Contemptor, sole Venatari and the remaining Aquilon and Custodian Guards. He lost two wounds to the ensemble, taking him to two wounds remaining. Key to this move was the fact that whilst no Justaerin survived, neither were the Custodes troops on the objective, meaning that no points were scored for it by either side.
Time was called and the game ended.

Results:
Traitors – 3 for the Primary Objective, 1x Corax killed, 1x Thunderhawk destroyed, 1x Valdor (Warlord) kill = 6VP
Loyalists – 3 for the Primary Objective, 1x Knight destroyed, 1x Stormblade destroyed = 5VP.

Summary:
A victory for the Traitors, not through tactical prowess, but luck.
In fact, the lack of tactical prowess on the Traitors side caused the loss of the Knight Lancer and the Stormblade. The lack of AA to take on the flying Lords of War when in the air made a win virtually impossible – especially when that minimal firepower was halved early on and then outright destroyed. In fact, the two catastrophic explosions quite frankly shaped the outcome of the game far more than I did with actions conducted by my Sons of Horus and Death Guard.
As a group we have discussed the scenario repeatedly and how it might have played out. Tactically, keeping the Thunderhawk down was definitely the right move – it was simply bad luck for the Loyalists that the explosion hit Corax and not Mortarion for example. If it didn’t stay in hover it would have left Corax open for a move and charge by Mortarion and the Deathshroud (as the Thunderhawk would have to move away from them, they would likely survive). Corax could have been taken off the table into ongoing reserves; a decision that does have some merit, but there wasn’t a huge amount of reasoning to do so at the time.
A quick estimate on the remaining Traitor heavy weapons would show that shooting the Thunderhawk was unlikely to be unsuccessful on average – and it was just pure luck that the rolls went well and that the last missile fired, penetrated and wasn’t saved.
There were no easy decisions for either side. There was literally no hope for the Traitor forces until the twin catastrophic explosions occurred and then, there was a glimmer.
It was an amazing game, but incredibly exasperating for me from effectively turn two – seeing me ending up lurching from turn to turn between ever increasingly difficult tactical moments. Some of those moments were made worse by over-reaction and thus, over-committing forces as new threats arrived from reserve. I think that outside of some horrific one-on-ones facing Custodes – this game was the single most difficult game I’ve played to date.
That said I think I chose the right armies to attend, as my Dark Mechanicum would have just been mulched by the Custodes. The Night Lords had a game at Warhammer World recently, so I wanted to change things up and the Death Guard and Sons of Horus, despite being book one armies, definitely do that.
Neither of my armies were in any way optimised – they’re literally my 3,000 point armies with a few extra bits swapped in and out. I like this because it removes any tailoring and instead sees armies that play to a theme. I actively chose the Lancer over running the Porphyrion again – something that would, in hindsight, have at least helped when the AA and Stormblade were gone, relieving a substantial amount of exasperation.
The following totals were the remaining points of the originals committed to battle:
Sons of Horus – c1,100pts
Death Guard – c.1,800pts
Raven Guard – c.200pts
Custodes – c.1,600pts
The Raven Guard were mauled – with their remaining points in a 15-ish man Tactical Squad on an objective. That’s par for the course though with them, as they infiltrate and flat out murder targets before being killed off themselves.
The Death Guard seem quite resilient in-game, but the reality of life is that they were committed late to the key plays and the Heavy Support Squads were largely ignored by the Loyalists in favour of going after the more critical Terminators, Knights and Tactical Squads. Nearly 1,200 points of what remained comprised of Mortarion and the two Spartans that were totally ignored too.
The Sons of Horus also seem quite well off, but when you consider the majority of those points is just Horus and the rest is the dregs of Veteran Squads, desperately clinging onto objectives, it’s not a massive amount. Effectively, none of the Legiones Astartes forces had anything near functional armies.
The group so often now has games that end with a 1-3VP difference, so it’s nice to see that there is a natural balance of armies and tactical application. As always it’s interesting to see the armies go through evolutionary and revolutionary changes.
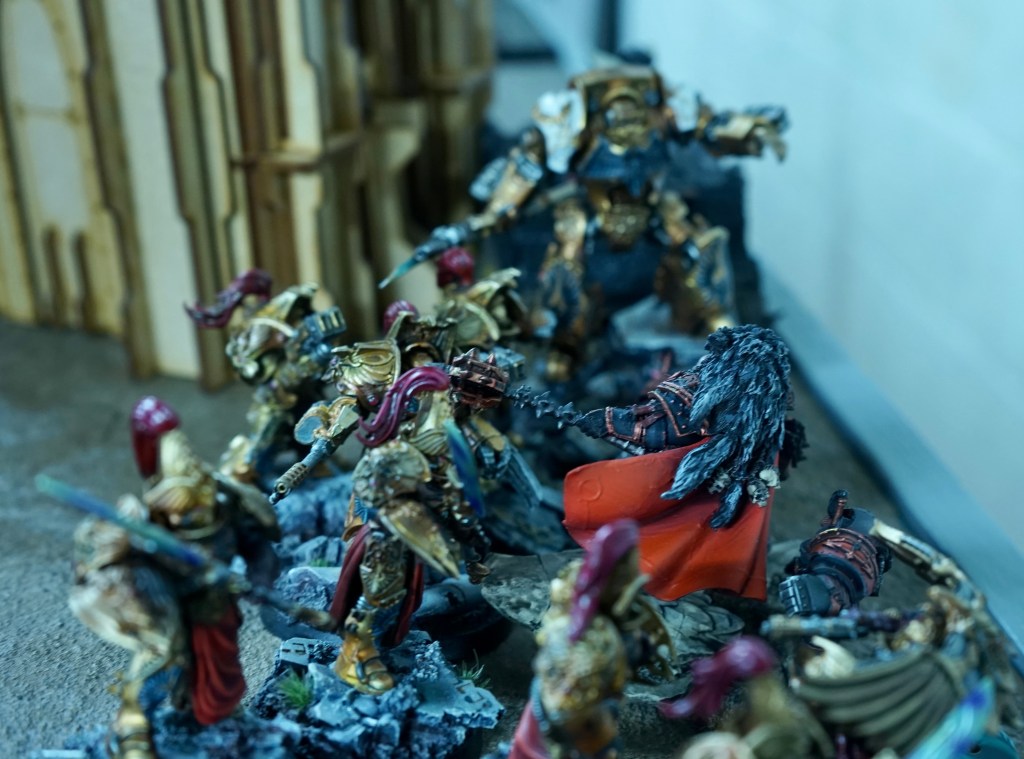
It was genuinely lovely to see the Raven Guard and Custodes on the table and in their fully painted glory. The Raven Guard are from @wallerL2896 and the Custodes from @wrights_adventurers_guild who are also on Instagram. My own Instagram @havoc1856 has more shots of the armies and various other projects.
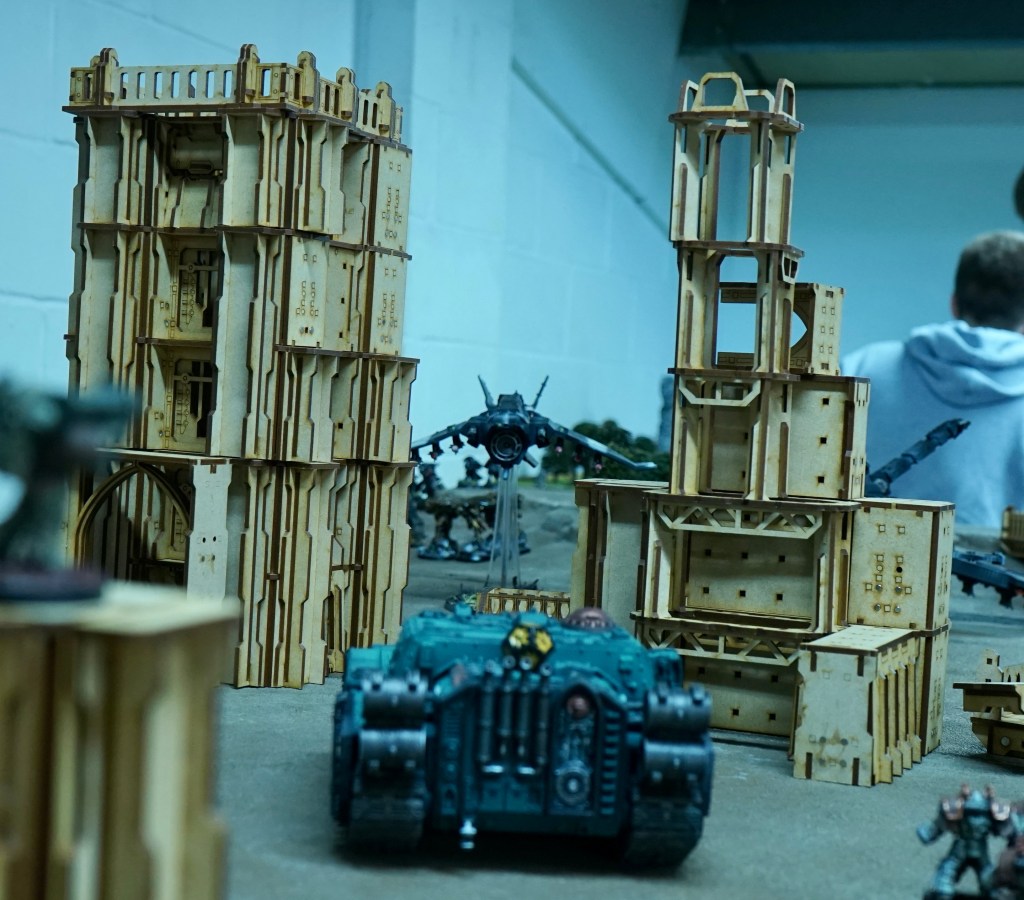
Thanks to 4TK Gaming for hosting us! Their MAD Terrain is what we used for the table and it’s all magnetised too for flexibility. It makes great Zone Mortalis terrain!

Now THIS looks like the dream HH game
LikeLike